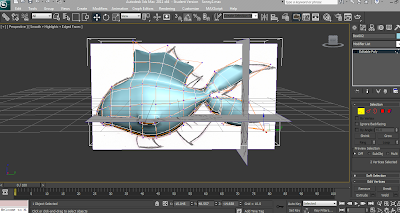
I then created a box with the length as 20.138, the width as 47.105 and the height as 12.746. I moved the box so that it was covering half of the fish face. I then moved the vertices over to cover the whole face and adjusted them to give it shape.
I made the box see through so that I was able to see the planes. I then selected the planes and adjusted the vertices to fit the plane.
I continued to do this up to the mouth. I then selected the front polygon and moved it by the Y axis to bring the front of the fish face forward.
I continued the shaping of the fish by moving the vertices of the top of the fishes body.
Below is an image of the finished body:
I then wanted to add some fins. I created the top fin by selecting the top for edges and extruding the upward, three times. I wanted Sonny to have two top fins so I created them at the same time. By moving the vertices I was able to give them fins some shape.
The side fins were created in a similar way. I selected an edge towards the lower end of the body and extruded them out. The tail fins were created by selected the end polygons and using extrude and bevel to bring them outwards. I then moved the vertices to give the fin shape.
I created the eyes for Sonny in the same way that we did in our tutorial (post is below)
I then went on to add material, and a mouth which was done by again extruding polygons.
Reference for the tutorial: http://www.3dk.org/tutorial/3ds-max-Modeling-a-Golden-Fish.html


No comments:
Post a Comment